 Step
5: Inking
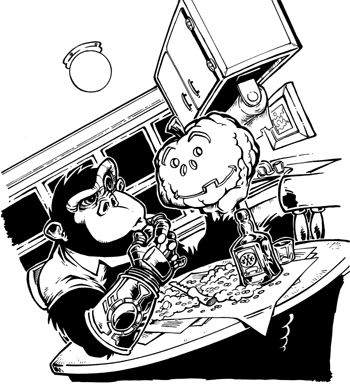
So, I scan the pencils in and scale them up to the appropriate size. I go around 150% for this picture and then print out my enlarged pencils on my ink-jet printer. Most people just enlarge on the copy machine for this stage. Since I don't have a copy machine... a scanner, printer, and Adobe Illustrator work just fine (although I'm sure the copier takes less time and effort).
I decide to ink this on Bienfang 100% Rag Translucent marker paper. To ink, I use a process called lightboxing, in which the pencils (or printout, in this case) is taped underneath my inking paper, then I place the two sheets on a lightbox (pictured here). This is a simple contraption that blows light through both sheets of paper, illuminating the pencils and making it easier to ink. This is especially handy when inking on thicker paper stock, the way pros do it. (If this were artwork for a comic book, I'd probably use genuine comic book stock or even bristol board). Since I'm using the marker paper, which is already pretty translucent, I won't need to use the lightbox all that much. Whatever the case, I do this because a) I hate erasing pencil lines and it's cleaner to just keep pencils and inks on separate sheets and b) this affords me the option of not having to draw pencils at full size.
 Now,
here's where I cheat a bit...
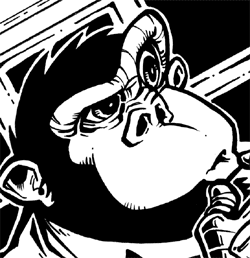
Traditionally, inkers use brushes, pen nibs, and bottles of ink. While I've done a bit of this in the past, I've yet to feel comfortable enough with a brush or nib for inking. For this job, I use Micron pens (.08 for outlining, .05 for some medium-level detail work, and .03 for those hard-to-reach places). Because I haven't really learned a darn thing since high-school, I fill in the larger black areas with a Sharpie marker. (I know, I know.)
 In
the middle of the pencilling stage I made the decision to keep my lines
free-flowing and I thought it would ad more visual interest to my linework
if I were to chuck rulers, oval templates, and french curves out the door.
Now that I'm inking, I find myself regretting that little decision, so
window panes and some of the cupboard are drawn with a ruler. I used a
french curve to help me out with the table edge. Oh, and I used the bottom
of a film container to do the light on the ceiling (you never know what'll
come in handy).
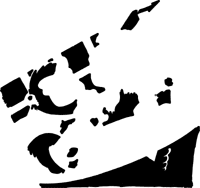
A word about spotting blacks: As shown on the right, I like to create a certain amount of visual interest with my black areas. By picking and choosing where to have thick areas of ink, it helps me know how the picture balances out and informs a bit of the coloring.
It's also worthwhile to note that, even this late in the game, I'm still bleeding the artwork off the edges of the picture.