
 Step
7: Highlights and Shade
Step
7: Highlights and Shade
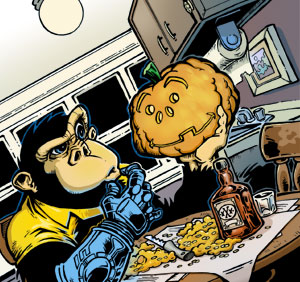
Now, each flat color layer gets its own "highlights and shading" layer. This is where I briefly become an artist again and start adding shading and, well, highlights to my color work. I keep these layers separate from the flat color for the sake of correcting mistakes.
 It's
also here that I decide to throw big layers of color on top of my background
and middle ground. Blue, actually. This sort of "grays out"
my background, causing the foreground to pop out and shine. (In photoshop,
I just place a big, blue layer in between foreground and middle ground
and choose the "color" option rather than "normal"
under the layer drop-down menu). Since I want certain elements (like the
ceiling light) to shine through the blue, I airbrush some subltle holes
in certain spots of my color layer using a layer mask (as you can see,
I'm a big fan of the layer mask).
It's
also here that I decide to throw big layers of color on top of my background
and middle ground. Blue, actually. This sort of "grays out"
my background, causing the foreground to pop out and shine. (In photoshop,
I just place a big, blue layer in between foreground and middle ground
and choose the "color" option rather than "normal"
under the layer drop-down menu). Since I want certain elements (like the
ceiling light) to shine through the blue, I airbrush some subltle holes
in certain spots of my color layer using a layer mask (as you can see,
I'm a big fan of the layer mask).
I try to resist the urge to use the dodge and burn tool which are quick-fixes when shading, but can also be limiting if you decide to make a big color change. Besides, in order to use dodge and burn, I'd have to apply it to my flat color layers, and I'd rather leave them intact.